
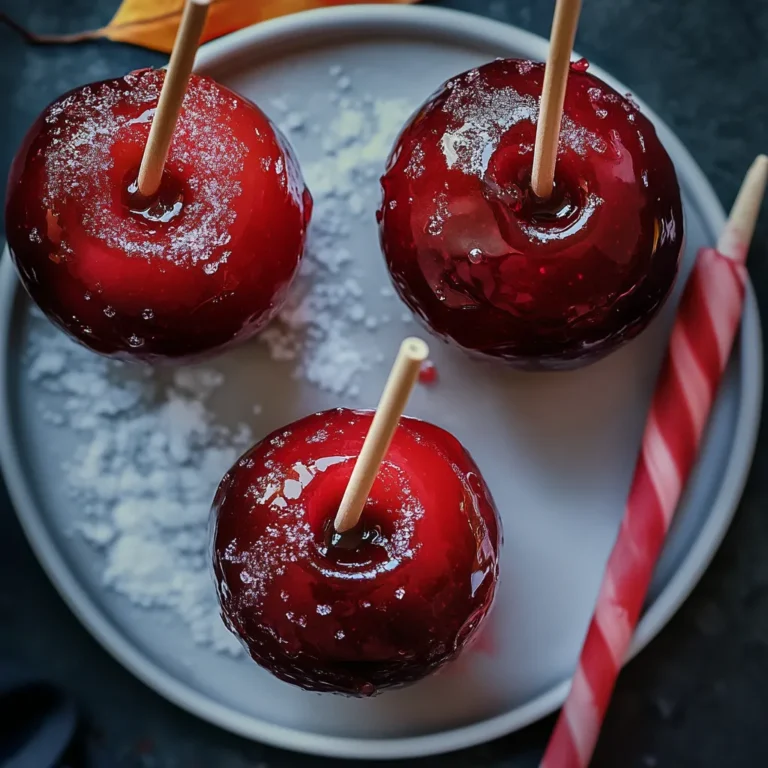
Introduction: Celebrate Halloween with a classic and spooky treat—Candied Apples! These glossy, bright red apples are a festive favorite, combining the crisp tartness of fresh apples with a sweet, crunchy candy coating. Perfect for Halloween parties, trick-or-treating events, or just as a fun seasonal treat, these candied apples are sure to delight both kids and adults. With a few simple ingredients and some basic candy-making techniques, you can create this iconic Halloween treat right at home.
Overview of the Recipe: Candied Apples are a timeless treat that combines the natural sweetness of apples with a crunchy, sugary coating. This recipe walks you through the steps to create perfectly coated apples, with a candy shell that’s not too thick and just the right amount of crunch. The process involves making a sugar syrup that hardens into a shiny, glass-like coating once cooled. This recipe also offers options to customize your candied apples with decorations like sprinkles or candy decorations for an extra festive touch.
History and Origin: Candied apples have a long history, dating back to the early 20th century. They were invented in 1908 by William W. Kolb, a candy maker in Newark, New Jersey, who was experimenting with red cinnamon candy for the Christmas season. He dipped apples into the candy mixture, creating the first candied apples, which he then displayed in his shop window. The treat quickly gained popularity and became a staple of autumn and Halloween celebrations. The bright red color of the candied apples made them an eye-catching treat, and they became synonymous with fall fairs, carnivals, and Halloween festivities.
Ingredients:
- 8 small apples
- 8 wooden sticks
- 2 cups granulated sugar
- 1 cup light corn syrup
- 1/2 cup water
- 1/2 teaspoon red food coloring
- Optional: candy decorations or sprinkles
Instructions:
- Prepare the Apples:
- Start by thoroughly washing the apples to remove any wax or residue. Dry them completely using a clean towel, as any moisture on the apples can prevent the candy coating from sticking properly.
- Remove the stems from the apples and insert a wooden stick firmly into the top of each apple, pushing it about halfway through to ensure it’s secure. Set the prepared apples aside.
- Prepare the Baking Sheet:
- Line a baking sheet with parchment paper or a silicone baking mat. This will prevent the candied apples from sticking to the surface as they cool and harden.
- Make the Candy Coating:
- In a medium-sized saucepan, combine the granulated sugar, light corn syrup, and water. Stir the mixture gently until the sugar is fully dissolved.
- Once the sugar is dissolved, stop stirring and increase the heat to medium-high. Allow the mixture to come to a boil without stirring. Insert a candy thermometer into the syrup to monitor the temperature.
- Continue to cook the syrup until it reaches 300°F, known as the hard crack stage. This temperature is crucial for achieving a candy coating that will harden properly on the apples. Be careful during this stage, as the syrup is extremely hot.
- Once the syrup reaches 300°F, immediately remove the saucepan from the heat. Quickly stir in the red food coloring until the color is evenly distributed throughout the syrup.
- Coat the Apples:
- Working quickly, dip each apple into the hot candy mixture, holding it by the stick and tilting the pan as necessary to ensure the apple is fully coated. Allow any excess candy to drip off before placing the apple on the prepared baking sheet.
- If you’re adding candy decorations or sprinkles, do so immediately while the coating is still sticky. Once the candy begins to cool, it will harden, and decorations won’t adhere as easily.
- Let Cool:
- Allow the coated apples to cool completely at room temperature. As they cool, the candy coating will harden into a glossy, glass-like shell. This process usually takes about 15-20 minutes.
- Serve:
- Once the candy coating is fully set and hard, the candied apples are ready to be served. Enjoy them as is, or wrap them individually in cellophane bags tied with festive ribbons for a fun Halloween treat.
Serving: This recipe makes 8 candied apples, perfect for sharing at a Halloween party or giving out as treats. Serve them on a decorative platter, or package them individually for a festive presentation. Candied apples are best enjoyed the day they are made, but they can be stored at room temperature for up to 2 days in a cool, dry place.
Pairing and Serving Suggestions:
- Beverages:
- Hot Apple Cider: A warm and spiced beverage that complements the sweetness of the candied apples.
- Pumpkin Spice Latte: A seasonal favorite that pairs well with the crisp, sugary bite of the apples.
- Hot Chocolate: Rich and creamy, hot chocolate offers a comforting contrast to the crunchy candy coating.
- Additional Treats:
- Caramel Popcorn: Sweet and salty, caramel popcorn adds another layer of flavor to your Halloween treat spread.
- Halloween Cookies: Decorated sugar cookies in spooky shapes can add variety and visual appeal to your dessert table.
- Mini Cupcakes: Bite-sized cupcakes with Halloween-themed decorations make for a fun and festive accompaniment.
Variations of the Recipe:
- Color Variations:
- Classic Red: Stick with the traditional red food coloring for a classic look.
- Black Candied Apples: For a spooky twist, use black food coloring to create eerie, dark candy apples.
- Multi-Colored Swirls: Create a swirl effect by adding drops of different food coloring and swirling them together before dipping the apples.
- Flavor Enhancements:
- Cinnamon Candy Apples: Add a few drops of cinnamon oil to the candy mixture for a spicy kick.
- Caramel-Coated Apples: Dip the apples in caramel first, let it set, and then coat them in the candy mixture for a double-layered treat.
- Chocolate-Dipped Apples: After the candy coating has set, dip the apples in melted chocolate and sprinkle with nuts or candies.
- Decorative Toppings:
- Sprinkles: Add Halloween-themed sprinkles for a fun and festive look.
- Crushed Nuts: Roll the coated apples in crushed peanuts, almonds, or pecans for added texture and flavor.
- Edible Glitter: Dust the finished apples with edible glitter for a sparkly, magical appearance.
- Dietary Modifications:
- Sugar-Free: Use a sugar-free syrup and sweetener to create a lower-calorie version of candied apples.
- Vegan: Ensure all ingredients, especially the red food coloring and decorations, are vegan-friendly.
- Presentation Ideas:
- Monster Faces: Decorate the apples with candy eyes, mouths, and other decorations to create spooky monster faces.
- Witch’s Cauldron: Use black food coloring and green sprinkles to create an apple that looks like a bubbling witch’s cauldron.
- Mummy Wraps: After the candy coating has set, wrap the apples in strips of white fondant or icing to create a mummy effect.
Health Benefits:
While candied apples are undoubtedly a sweet treat, they do offer some health benefits when enjoyed in moderation:
- Vitamins and Fiber: Apples are rich in dietary fiber, vitamin C, and antioxidants, which can contribute to overall health.
- Antioxidants: The skin of the apple contains quercetin, an antioxidant that may help reduce inflammation and boost the immune system.
- Energy Boost: The natural sugars in apples, combined with the added sugar in the candy coating, provide a quick source of energy, making these treats a fun way to refuel during festive activities.
Notes:
- Candy Thermometer: Using a candy thermometer is essential for achieving the correct temperature for the candy coating. The hard crack stage (300°F) ensures the coating will be crisp and not sticky.
- Work Quickly: Once the candy mixture reaches the correct temperature, work quickly to coat the apples before the syrup begins to harden. Reheating the mixture can cause it to become too thick.
- Safety First: Be cautious when working with hot sugar syrup, as it can cause severe burns. Keep children and pets away from the kitchen during this stage.
FAQs:
- Can I use different types of apples for this recipe? Yes, you can use any variety of apples you prefer. Tart apples like Granny Smith provide a nice contrast to the sweet candy coating, but any firm apple will work well.
- What if I don’t have a candy thermometer? If you don’t have a candy thermometer, you can test the candy mixture by dropping a small amount into a glass of cold water. If it hardens into brittle threads, it has reached the hard crack stage.
- Can I make candied apples in advance? Candied apples are best eaten the same day they are made. However, they can be made a day ahead and stored at room temperature in a cool, dry place.
- Why is my candy coating sticky? If the candy coating is sticky, it may not have reached the proper temperature. Ensure the syrup reaches 300°F (hard crack stage) for a firm, non-sticky coating.
- How do I clean the pan after making the candy coating? To clean the saucepan, fill it with water and bring it to a boil. The hot water will dissolve any remaining candy residue, making it easier to clean.
Conclusion: These Spooky Candied Apples for Halloween are a fun, festive, and delicious treat that captures the spirit of the season. With their glossy red coating and endless possibilities for decoration, they are sure to be a hit at any Halloween gathering. Whether you keep them classic or customize them with your favorite toppings and colors, these candied apples are a timeless treat that everyone will love. Enjoy the process of making these delightful sweets and share the joy of Halloween with family and friends!