
Introduction: Salted Caramel Bars are the perfect combination of sweet, buttery goodness and a touch of salty indulgence. These bars are easy to make and are sure to impress anyone with their rich caramel flavor and crunchy, crumbly topping. Whether you’re preparing a treat for a family gathering, a bake sale, or simply indulging yourself, these salted caramel bars will satisfy your sweet cravings with every bite.
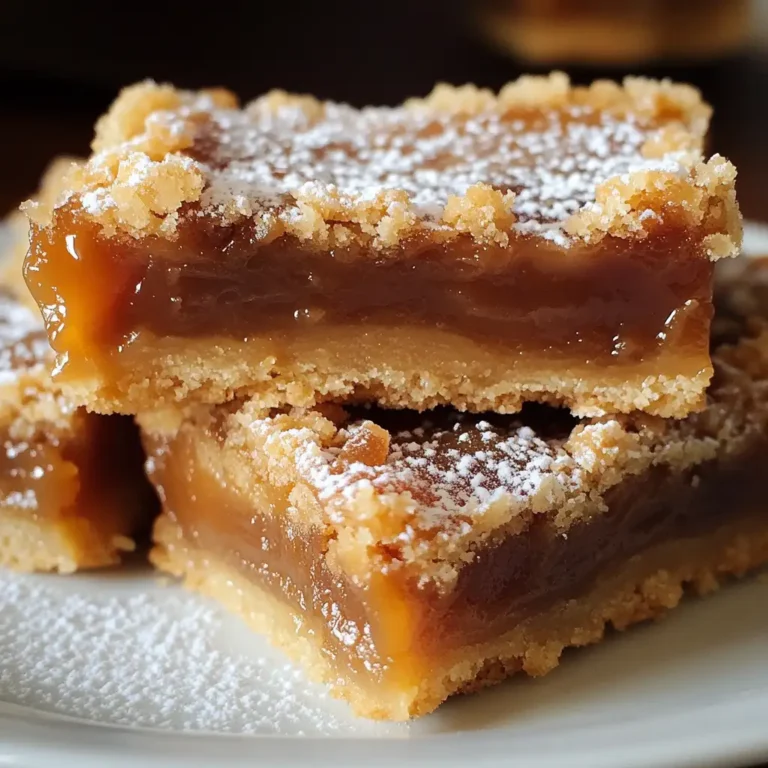
Overview of the Recipe: These Salted Caramel Bars are made with a simple yet decadent combination of ingredients. A buttery, crumbly dough forms the base and topping of these bars, while a luscious layer of caramel sauce provides the gooey center. The sea salt flakes sprinkled on top add a delightful contrast to the sweetness, making these bars a well-balanced dessert that’s hard to resist.
History and Origin: Salted caramel is a flavor that has gained immense popularity in recent years, thanks to its perfect balance of sweet and salty. The concept of adding salt to caramel is believed to have originated in Brittany, France, where salted butter is a regional specialty. Over time, this combination has made its way into various desserts, including cookies, cakes, and bars, becoming a favorite in kitchens around the world. The simplicity of the ingredients, combined with the luxurious taste of caramel, makes these salted caramel bars a modern classic in the world of baking.
Ingredients:
- 1 cup unsalted butter, softened
- 1/2 cup granulated sugar
- 1/4 cup light brown sugar, packed
- 1 teaspoon vanilla extract
- 2 cups all-purpose flour
- 1/2 teaspoon salt
- 1 cup caramel sauce
- 1 teaspoon sea salt flakes
Instructions:
- Preheat the Oven: Begin by preheating your oven to 350°F (175°C). Prepare an 8×8-inch baking dish by lining it with parchment paper. This will make it easier to remove the bars once they’re baked and cooled.
- Cream the Butter and Sugars: In a large mixing bowl, combine the softened butter, granulated sugar, and light brown sugar. Using a hand mixer or stand mixer, cream the ingredients together until the mixture becomes light and fluffy. This should take about 2-3 minutes. The creaming process incorporates air, which helps to create a tender and crumbly texture in the finished bars.
- Add the Vanilla Extract: Mix in the vanilla extract until it is fully incorporated into the butter and sugar mixture. The vanilla adds a subtle depth of flavor that complements the sweetness of the caramel.
- Incorporate the Dry Ingredients: Gradually add the all-purpose flour and salt to the wet ingredients. Mix on low speed until a crumbly dough forms. The dough will be slightly dry but should hold together when pressed.
- Form the Base Layer: Take two-thirds of the dough and press it into the bottom of the prepared baking dish. Use your fingers or the back of a spoon to create an even layer. This layer will form the base of your salted caramel bars.
- Pre-Bake the Crust: Place the baking dish in the preheated oven and bake the crust for 10-12 minutes, or until it is lightly golden around the edges. This step ensures that the base is firm enough to support the caramel layer.
- Add the Caramel Layer: Remove the baking dish from the oven and pour the caramel sauce evenly over the partially baked crust. The caramel should spread out to cover the entire base. If necessary, use a spatula to smooth it out.
- Create the Crumble Topping: Take the remaining dough and crumble it over the top of the caramel layer. The uneven pieces of dough will create a delicious, crumbly topping as they bake.
- Bake Again: Return the baking dish to the oven and bake for an additional 15-20 minutes, or until the topping is golden brown and the caramel is bubbling around the edges. The bubbling caramel indicates that it has thickened and set.
- Add the Sea Salt: Once baked, remove the bars from the oven and immediately sprinkle sea salt flakes over the top while the caramel is still warm. The salt adds a delightful contrast to the sweet caramel and enhances the overall flavor of the bars.
- Cool and Slice: Allow the bars to cool completely in the pan before attempting to slice them. This cooling period is crucial as it allows the caramel to firm up, making it easier to cut clean squares without the caramel oozing out.
Serving Suggestions: These Salted Caramel Bars are incredibly versatile and can be served in various ways to suit different occasions:
- Dessert: Serve the bars as a stand-alone dessert, perhaps with a scoop of vanilla ice cream on the side for an extra treat.
- Tea Time: Pair the bars with a cup of coffee or tea for a delightful afternoon snack.
- Gift Giving: Package the bars in decorative boxes or bags and give them as homemade gifts during the holiday season.
Variations of the Recipe: While the classic salted caramel bars are delicious as is, you can experiment with a few variations to add a personal touch:
- Chocolate Salted Caramel Bars: Add a layer of melted chocolate on top of the caramel before adding the crumbly topping. This will create a rich, chocolatey twist on the original recipe.
- Nutty Salted Caramel Bars: Incorporate chopped nuts, such as pecans or walnuts, into the dough or sprinkle them on top of the caramel layer for added crunch and flavor.
- Gluten-Free Salted Caramel Bars: Substitute the all-purpose flour with a gluten-free flour blend to make these bars suitable for those with gluten sensitivities.
Health Benefits: While these bars are certainly an indulgent treat, they do offer some benefits when enjoyed in moderation:
- Portion Control: The rich flavor and sweetness of the bars mean that a small portion is often satisfying, helping to prevent overindulgence.
- Mental Satisfaction: Satisfying a sweet craving with a well-made treat can improve mood and provide a sense of enjoyment.
Notes:
- Storage: Store the salted caramel bars in an airtight container at room temperature for up to 3 days. For longer storage, keep them in the refrigerator for up to a week. These bars can also be frozen for up to 3 months; thaw at room temperature before serving.
- Caramel Sauce: Use a high-quality store-bought caramel sauce, or if you’re feeling adventurous, make your own homemade caramel sauce for an extra special touch.
- Baking Dish: For thicker bars, you can use a smaller baking dish, such as a 7×7-inch pan. Just be sure to adjust the baking time accordingly.
FAQs:
- Can I use salted butter instead of unsalted butter? Yes, you can use salted butter, but you may want to reduce or omit the additional salt in the recipe to avoid making the bars too salty.
- What kind of caramel sauce should I use? A thick, rich caramel sauce works best for this recipe. You can use store-bought caramel, or make your own if you prefer a homemade touch.
- How do I keep the caramel from becoming too hard? Ensure that the caramel sauce you use is not overly cooked or too thick before adding it to the bars. Also, avoid overbaking, as this can cause the caramel to harden excessively.
- Can I add chocolate chips to the recipe? Yes, chocolate chips can be added to the dough or sprinkled over the caramel layer before baking for a chocolate-caramel combination.
- How do I prevent the bars from sticking to the parchment paper? Using parchment paper is key to preventing sticking, but you can also lightly grease the parchment paper with butter or cooking spray for extra insurance.
Conclusion: Salted Caramel Bars are a delightful treat that balances sweet and salty flavors perfectly. Easy to make and loved by all, these bars are ideal for any occasion, whether you’re hosting a party, baking for a loved one, or simply treating yourself. With their rich caramel center and crumbly, buttery topping, these bars are sure to become a favorite in your dessert repertoire. Try out the recipe today and enjoy the irresistible combination of salted caramel in every bite!