
Introduction
There’s nothing quite like the rich, creamy texture and delicious taste of homemade peanut butter fudge. This classic treat is a favorite for good reason: it’s simple to make, deeply satisfying, and always a crowd-pleaser. Whether you’re making it for a holiday gathering, as a gift, or just to satisfy your sweet tooth, this recipe for homemade peanut butter fudge is sure to become a staple in your dessert repertoire.
Overview of the Recipe
This peanut butter fudge recipe uses just a few basic ingredients—sugar, milk, peanut butter, and vanilla—to create a smooth, melt-in-your-mouth treat. The process involves boiling sugar and milk, then quickly mixing in peanut butter and vanilla to create a rich, creamy fudge. Once poured into a pan and cooled, the fudge sets into perfect squares that are easy to cut and share. This recipe yields a large batch, making it perfect for sharing with friends and family.
History and Origin
Fudge is a confection that originated in the United States in the late 19th century. The exact origin is unclear, but it is believed that fudge was created by accident when a batch of caramel was “fudged” or made incorrectly. The resulting product was a softer, sweeter candy that quickly became popular. Peanut butter fudge, in particular, is a variation that has gained widespread popularity due to the creamy, nutty flavor of peanut butter, which complements the sweetness of traditional fudge beautifully.
Ingredients
- 6 cups of sugar
- 3 cups of milk
- 6 cups of peanut butter
- 6 teaspoons of vanilla extract
Instructions
Prepare the Fudge Mixture
- Combine Sugar and Milk: In a large heavy-bottomed pot or cooker, combine 6 cups of sugar with 3 cups of milk. Stir the mixture until the sugar is fully dissolved.
- Bring to a Boil: Place the pot on the stove over medium-high heat. Bring the mixture to a rapid boil, stirring constantly to prevent the sugar from burning.
- Boil for 2 ½ Minutes: Once the mixture reaches a rolling boil, continue to boil it for exactly 2 and a half minutes. This step is crucial for achieving the right consistency for the fudge.
Add Peanut Butter and Vanilla
- Remove from Heat: After boiling, immediately remove the pot from the heat. Timing is important here to ensure the fudge sets properly.
- Add Peanut Butter and Vanilla: Quickly add 6 cups of peanut butter and 6 teaspoons of vanilla extract to the hot mixture. Stir vigorously until the peanut butter is completely melted and the mixture is smooth and well-blended.
Pour and Set the Fudge
- Pour into Pan: Grease an 8×8 inch pan, or if you’re making a larger batch, prepare multiple pans. Pour the fudge mixture into the prepared pan(s), spreading it out evenly with a spatula.
- Cool and Set: Allow the fudge to cool at room temperature. Once fully cooled, the fudge will set into a firm, sliceable texture.
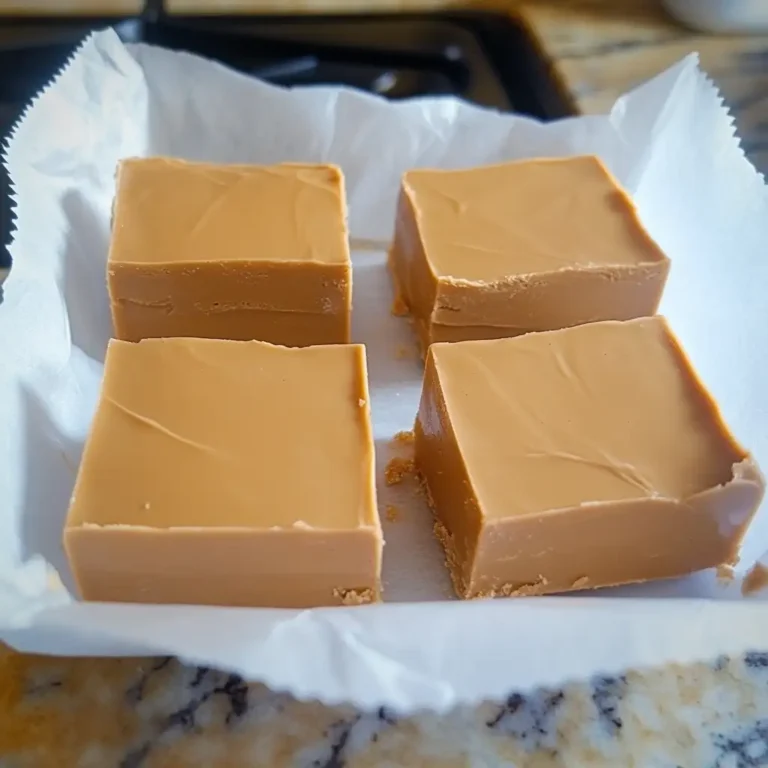
- Cut into Squares: Once the fudge is set, cut it into squares of your desired size. For the best results, use a sharp knife to make clean cuts.
Serving
Homemade peanut butter fudge is best served at room temperature, where its creamy texture can be fully appreciated. Arrange the fudge squares on a decorative platter or in a tin for gifting. This fudge makes a great treat for parties, holidays, or as a homemade gift during the festive season.
Pairing and Serving Suggestions
- Beverage Pairing: Pair the fudge with a glass of cold milk, hot coffee, or a cup of rich hot cocoa for a comforting treat.
- Toppings: For an extra touch, sprinkle sea salt or crushed peanuts on top of the fudge before it sets for added flavor and texture.
- Chocolate Drizzle: Drizzle melted chocolate over the cooled fudge for a chocolate-peanut butter twist.
Variations of the Recipe
- Chocolate Peanut Butter Fudge: Add 1 cup of melted chocolate chips to the mixture before pouring it into the pan for a rich, chocolatey variation.
- Crunchy Peanut Butter Fudge: Use crunchy peanut butter instead of smooth to add a bit of texture and crunch to the fudge.
- Layered Fudge: Create a layered effect by pouring half the peanut butter fudge into the pan, letting it set slightly, then pouring a layer of chocolate fudge on top.
Health Benefits and Notes
Peanut butter is a good source of protein and healthy fats, which can make this fudge a slightly more nutritious treat compared to other sweets. However, given the high sugar content, it’s best enjoyed in moderation. For those looking to reduce sugar intake, consider using a sugar substitute suitable for high-heat cooking.
FAQs
Q: Can I use a different type of milk?
A: Yes, you can substitute the regular milk with evaporated milk for a creamier texture, or use almond or soy milk for a dairy-free version.
Q: How long does the fudge last?
A: Store the fudge in an airtight container at room temperature for up to two weeks, or in the refrigerator for up to a month. You can also freeze it for longer storage.
Q: Can I make a smaller batch?
A: Yes, you can easily halve the ingredients to make a smaller batch. Just be sure to adjust the size of the pan accordingly.
Q: What if my fudge doesn’t set properly?
A: If your fudge doesn’t set, it may have been undercooked or the sugar was not boiled long enough. You can try reheating the mixture and boiling it a bit longer, then pouring it back into the pan to set.
Conclusion
This homemade peanut butter fudge is a rich, creamy, and indulgent treat that’s perfect for any occasion. With its simple ingredients and straightforward process, this recipe is accessible for both novice and experienced bakers. Whether you enjoy it as a sweet snack or share it as a gift, this peanut butter fudge is sure to bring smiles to anyone who tastes it. Enjoy the melt-in-your-mouth goodness and the satisfaction of making a classic dessert from scratch!