
Introduction: Chocolate lovers, rejoice! This Easy Chocolate Pie is a delightful dessert that combines rich, creamy chocolate filling with a flaky pie crust, all topped with a light and fluffy whipped cream. Whether you’re preparing a dessert for a special occasion or just craving something sweet, this pie is sure to satisfy. With a simple list of ingredients and straightforward instructions, you can whip up this indulgent treat in no time.
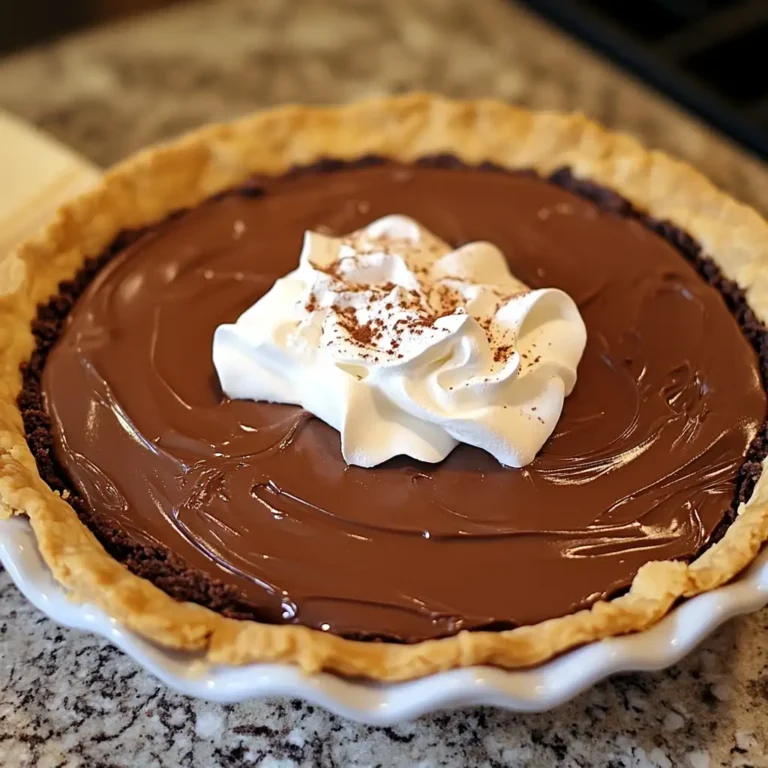
Overview of the Recipe: This Easy Chocolate Pie recipe features a smooth and velvety chocolate pudding filling made from scratch, poured into a pre-baked pie shell. Topped with Cool Whip or homemade whipped cream, this pie is a crowd-pleaser that’s perfect for any occasion. The recipe requires minimal cooking time, and the result is a deliciously creamy pie that will impress everyone at the table.
History and Origin: Chocolate pie has long been a staple in American dessert traditions, particularly in the southern United States. The origins of this dessert can be traced back to the early 20th century when chocolate became more accessible and widely used in baking. Simple chocolate pies like this one became popular due to their ease of preparation and the rich, comforting flavor they offer.
Ingredients:
- 1 1/2 cups milk
- 1/2 cup sugar
- 1/4 teaspoon salt
- 3 tablespoons cocoa powder
- 3 tablespoons all-purpose flour
- 2 egg yolks, beaten
- 1 teaspoon vanilla extract
- 1 baked pie shell
- Cool Whip or whipped cream (for topping)
Instructions:
- Prepare the Milk Mixture:
- Begin by heating 1 1/2 cups of milk in a medium-sized pot over medium heat. Warm the milk until it’s hot but not boiling.
- Mix the Dry Ingredients:
- In a separate bowl, combine 1/2 cup of sugar, 3 tablespoons of all-purpose flour, 1/4 teaspoon of salt, and 3 tablespoons of cocoa powder. Mix well to ensure the ingredients are evenly distributed.
- Combine and Thicken:
- Gradually add the dry mixture to the pot of hot milk, stirring constantly with a whisk to avoid lumps. Continue stirring until the mixture begins to thicken. This should take about 5-7 minutes.
- Temper the Egg Yolks:
- In a small bowl, beat the 2 egg yolks. To temper the eggs and prevent curdling, slowly add a small amount of the hot milk mixture to the beaten yolks while stirring continuously.
- Once the yolks are tempered, pour the yolk mixture back into the pot with the rest of the milk mixture, stirring constantly.
- Cook the Pudding:
- Continue to cook the chocolate mixture for at least 2 more minutes, allowing it to thicken into a pudding-like consistency. Be sure to stir constantly to avoid scorching.
- Add the Vanilla Extract:
- Remove the pot from the heat and stir in 1 teaspoon of vanilla extract. Mix well to incorporate the flavor evenly.
- Fill the Pie Shell:
- Pour the thickened chocolate pudding into the pre-baked pie shell, spreading it evenly with a spatula.
- Cool the Pie:
- Allow the pie to cool at room temperature for about 30 minutes. Then, transfer it to the refrigerator to chill completely, at least 2 hours, before serving.
- Top with Whipped Cream:
- Just before serving, top the cooled pie with a generous layer of Cool Whip or homemade whipped cream. For an extra touch, you can also sprinkle chocolate shavings or drizzle chocolate sauce over the whipped topping.
Serving: This Easy Chocolate Pie serves 8 and is perfect for a variety of occasions—from family dinners to potlucks or holiday gatherings. It’s best served chilled, with a dollop of whipped cream that complements the rich chocolate filling.
Pairing and Serving Suggestions:
- Beverages: Pair this pie with a glass of cold milk, hot coffee, or a rich hot chocolate for a decadent dessert experience.
- Toppings: For added texture and flavor, consider adding a sprinkle of crushed nuts, chocolate shavings, or a drizzle of caramel sauce over the whipped cream.
- Sides: Serve with a scoop of vanilla ice cream on the side for an extra indulgent treat.
Variations of the Recipe:
- Chocolate Peanut Butter Pie: Add 1/2 cup of peanut butter to the chocolate mixture before pouring it into the pie shell for a delicious chocolate-peanut butter combination.
- Mint Chocolate Pie: Stir in 1/2 teaspoon of peppermint extract along with the vanilla for a refreshing minty twist.
- Nutty Chocolate Pie: Add a layer of crushed nuts, such as pecans or walnuts, at the bottom of the pie shell before pouring in the chocolate filling.
Health Benefits Notes: This pie is an indulgent treat, so it’s best enjoyed in moderation. For a slightly lighter version, you can use low-fat milk and opt for a lighter whipped topping. Additionally, using a whole grain pie crust can add a bit more fiber to the dessert.
FAQs:
- Can I use a store-bought pie crust?
- Yes, a store-bought pie crust works perfectly for this recipe. Just make sure to bake it according to the package instructions before filling it with the chocolate mixture.
- How do I store leftover pie?
- Store any leftover pie covered in the refrigerator for up to 3 days. The pie should be kept chilled to maintain its texture and flavor.
- Can I make this pie ahead of time?
- Absolutely! You can make the pie up to 2 days in advance. Just keep it refrigerated and add the whipped topping just before serving.
- Can I use dark chocolate instead of cocoa powder?
- Yes, you can substitute the cocoa powder with melted dark chocolate for a richer flavor. Use about 4 ounces of dark chocolate and reduce the sugar to 1/4 cup.
Conclusion: This Easy Chocolate Pie is a simple yet decadent dessert that’s sure to satisfy any chocolate craving. With its smooth and creamy filling, complemented by a flaky pie crust and topped with fluffy whipped cream, it’s a dessert that’s perfect for any occasion. Whether you’re making it for a special event or just because, this pie is a quick and easy way to indulge in a classic chocolate treat. Experiment with the variations to customize the pie to your liking, and enjoy every delicious bite!