
Overview of the Recipe
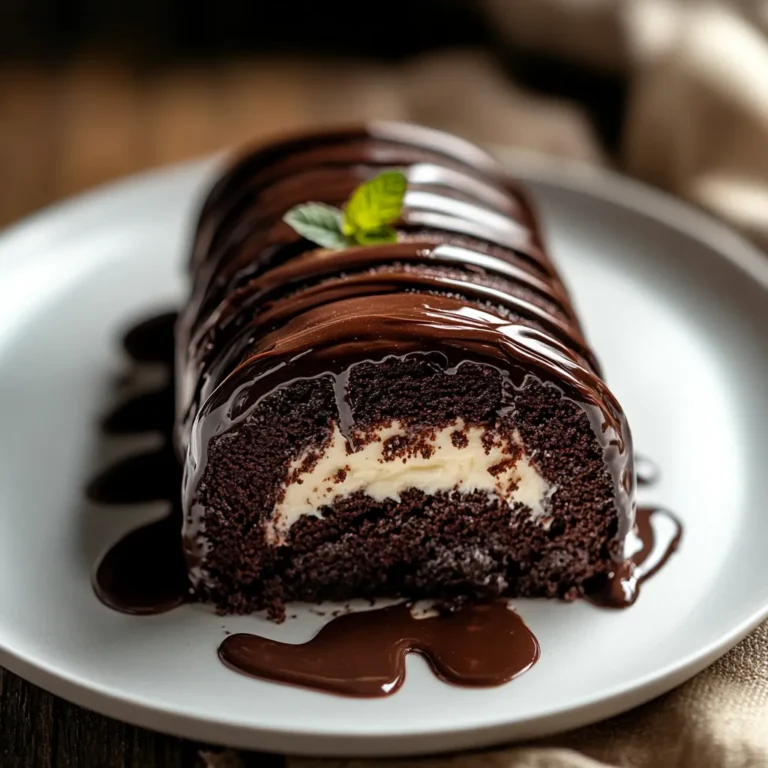
The Chocolate Swiss Roll Cake is a timeless dessert that features a light, fluffy chocolate sponge cake rolled with a rich whipped cream filling and topped with a glossy chocolate ganache. This elegant dessert is perfect for special occasions or as a decadent treat for any chocolate lover. The combination of textures—from the tender cake to the creamy filling and smooth ganache—makes it a delightful indulgence.
History and Origin
The Swiss Roll, despite its name, did not originate in Switzerland. This rolled cake is believed to have European origins, with roots in Central Europe, likely Austria. The Swiss Roll became popular across the continent, and its variations have evolved over time. The chocolate version is a beloved twist on the classic vanilla or jam-filled roll, offering a more decadent flavor profile.
Ingredients
For the Cake:
- 1/2 cup all-purpose flour
- 1/3 cup unsweetened cocoa powder
- 1 teaspoon baking powder
- 1/4 teaspoon salt
- 3 large eggs
- 1/2 cup granulated sugar
- 1/4 cup vegetable oil
- 1 teaspoon vanilla extract
For the Filling:
- 1 cup heavy cream
- 1/4 cup powdered sugar
- 1 teaspoon vanilla extract
For the Ganache:
- 1/2 cup heavy cream
- 1 cup semi-sweet chocolate chips
Instructions
1. Prepare the Cake
- Preheat the Oven: Preheat your oven to 350°F (175°C). Line a 15×10-inch jelly roll pan with parchment paper, making sure the paper extends slightly over the edges of the pan for easy removal later.
- Mix the Dry Ingredients: In a medium bowl, sift together 1/2 cup of all-purpose flour, 1/3 cup of unsweetened cocoa powder, 1 teaspoon of baking powder, and 1/4 teaspoon of salt. Sifting helps to aerate the mixture and ensures there are no lumps, which is crucial for the light texture of the cake. Set the dry ingredients aside.
- Beat the Eggs and Sugar: In a large mixing bowl, beat 3 large eggs and 1/2 cup of granulated sugar using an electric mixer on high speed. Continue beating until the mixture becomes pale, thick, and creamy. This process usually takes about 5-7 minutes. The volume of the mixture should double as air is incorporated, which is essential for a fluffy cake.
- Add the Wet Ingredients: Gradually add 1/4 cup of vegetable oil and 1 teaspoon of vanilla extract to the egg mixture. Mix until everything is well combined. The oil adds moisture, while the vanilla enhances the flavor of the cake.
- Combine the Wet and Dry Ingredients: Slowly fold the dry ingredients into the wet mixture using a spatula. Fold gently to avoid deflating the batter. The goal is to keep the mixture as light and airy as possible.
- Bake the Cake: Pour the batter into the prepared jelly roll pan and spread it evenly with a spatula. Gently tap the pan on the counter to release any trapped air bubbles. Bake in the preheated oven for 10-12 minutes, or until the cake is springy to the touch and a toothpick inserted into the center comes out clean.
2. Roll the Cake
- Prepare for Rolling: While the cake is baking, lay out a clean kitchen towel on your work surface. Dust the towel generously with powdered sugar. This will prevent the cake from sticking to the towel when rolling.
- Transfer the Cake: As soon as the cake is done baking, remove it from the oven and immediately turn it out onto the prepared towel. Carefully peel off the parchment paper. This step needs to be done quickly while the cake is still warm and pliable.
- Roll the Cake: Starting from one short end, roll the cake up with the towel inside. This initial roll is essential as it helps to set the shape of the cake. Let the rolled cake cool completely in this shape. The towel prevents the cake layers from sticking together and provides a guide for rolling.
3. Prepare the Filling
- Whip the Cream: In a mixing bowl, combine 1 cup of heavy cream, 1/4 cup of powdered sugar, and 1 teaspoon of vanilla extract. Using an electric mixer, beat the mixture until stiff peaks form. The cream should be thick enough to hold its shape when the beaters are lifted from the bowl.
- Unroll and Fill the Cake: Once the cake is completely cool, carefully unroll it. Spread the whipped cream filling evenly over the surface of the cake. Be sure to leave a small border around the edges to prevent the filling from spilling out when you roll the cake back up.
- Re-roll the Cake: Gently re-roll the cake, this time without the towel. Roll it as tightly as possible without squeezing out the filling. Place the rolled cake seam-side down on a serving plate.
4. Prepare the Ganache
- Heat the Cream: In a small saucepan, heat 1/2 cup of heavy cream over medium heat until it just begins to simmer. Do not let it boil.
- Melt the Chocolate: Place 1 cup of semi-sweet chocolate chips in a heatproof bowl. Pour the hot cream over the chocolate chips and let it sit for 1-2 minutes to allow the chocolate to melt.
- Stir the Ganache: After the chocolate has softened, stir the mixture until it becomes smooth and glossy. This process should take about 2-3 minutes. If the chocolate hasn’t fully melted, you can microwave the mixture in 10-second intervals, stirring in between, until smooth.
- Glaze the Cake: Pour the ganache over the rolled cake, using a spatula to smooth it over the top and sides. The ganache should coat the cake evenly, creating a shiny, luscious finish. For a neater presentation, you can place a sheet of parchment paper under the cake to catch any drips.
5. Chill and Serve
- Chill the Cake: Place the cake in the refrigerator for at least 30 minutes to allow the ganache to set and the flavors to meld together. Chilling also makes slicing the cake easier and cleaner.
- Serve: Once the ganache is firm, slice the Chocolate Swiss Roll Cake into even portions. The cake is best served slightly chilled or at room temperature, depending on your preference.
Pairing and Serving Suggestions
The Chocolate Swiss Roll Cake pairs beautifully with a variety of accompaniments:
- Fresh Berries: Serve with fresh raspberries or strawberries to add a burst of freshness that complements the rich chocolate.
- Whipped Cream: A dollop of whipped cream on the side adds an extra layer of indulgence.
- Ice Cream: Vanilla or coffee-flavored ice cream makes a delicious contrast to the cake’s intense chocolate flavor.
Variations of the Recipe
- Mocha Swiss Roll: Add 1-2 teaspoons of instant coffee granules to the ganache for a mocha twist.
- Mint Chocolate Swiss Roll: Add 1/2 teaspoon of peppermint extract to the whipped cream filling and top the ganache with crushed candy canes for a festive variation.
- Raspberry Chocolate Swiss Roll: Spread a thin layer of raspberry jam over the cake before adding the whipped cream filling. The tartness of the raspberries pairs wonderfully with the chocolate.
Health Benefits Notes
While the Chocolate Swiss Roll Cake is undeniably a treat, it can be enjoyed in moderation as part of a balanced diet. Dark chocolate used in the ganache has antioxidant properties and can contribute to heart health. Additionally, by using a light hand with the sugar and incorporating fresh fruit as a side, this dessert can be a slightly healthier indulgence.
FAQs
Q: Can I make the cake ahead of time? A: Yes, the Chocolate Swiss Roll Cake can be made a day in advance. Store it in the refrigerator and bring it to room temperature before serving.
Q: What should I do if my cake cracks while rolling? A: Cracks are common, especially if the cake is not rolled while warm. If it cracks, don’t worry—simply use the ganache to cover any imperfections, and the cake will still look and taste delicious.
Q: Can I freeze the Swiss Roll? A: Yes, you can freeze the Chocolate Swiss Roll Cake. Wrap it tightly in plastic wrap, then in aluminum foil, and freeze for up to 2 months. Thaw in the refrigerator overnight before serving.
Conclusion
The Chocolate Swiss Roll Cake is a dessert that is as delightful to make as it is to eat. Its elegant appearance and rich flavors make it a showstopper for any occasion. Whether you’re enjoying it with family or serving it at a gathering, this classic cake is sure to impress. With its simple ingredients and detailed instructions, even novice bakers can achieve a professional-looking dessert. Experiment with variations to suit your taste, and savor the combination of chocolatey goodness and creamy filling with every bite.