
Introduction to Banana Cheesecake Icebox Cake
If you're looking for a dessert that's both delicious and easy to prepare, the banana cheesecake icebox cake might just be your new go-to recipe. This delightful treat combines the creamy goodness of cheesecake with the tropical flair of bananas, all layered between conveniently chilled graham cracker or cookie crusts. But what makes it truly special? Let's dive into why icebox cakes have become a beloved choice for dessert enthusiasts.
Why Choose an Icebox Cake for Dessert?
Icebox cakes have a charming simplicity that makes them perfect for any occasion. Here are a few reasons you might want to embrace this style of dessert:
-
No Baking Required: One of the best features of an icebox cake is that it requires no oven time. You can say goodbye to preheating your oven, which is especially appreciated during the hotter months or when you simply don’t have the time for complex baking.
-
Chill and Serve: Once your banana cheesecake icebox cake is assembled, all you need to do is let it chill in the refrigerator. This not only deepens the flavors but also allows the layers to meld beautifully, creating a luscious texture.
-
Versatile Ingredients: You can readily customize your cake. Swap out bananas for strawberries or blueberries, or even add a chocolate layer—endless possibilities await! For recipe inspiration and tips, check out the versatile options at Food Network.
Now, you might wonder, “How can a cake this easy taste so indulgent?” The secret is in layering. Think of it as a dessert where the graham crackers or cookies soak up the creamy filling and become deliciously soft while retaining some texture. The result is a smooth, velvety mouthfeel that pairs perfectly with the sweetness of bananas.
Especially if you have friends or family pop by unexpectedly, an icebox cake is a breeze to whip up. With technically minimal effort, you can treat them to something that tastes as though you spent hours in the kitchen. So, grab your ingredients, and get ready to impress with this delicious banana cheesecake icebox cake!
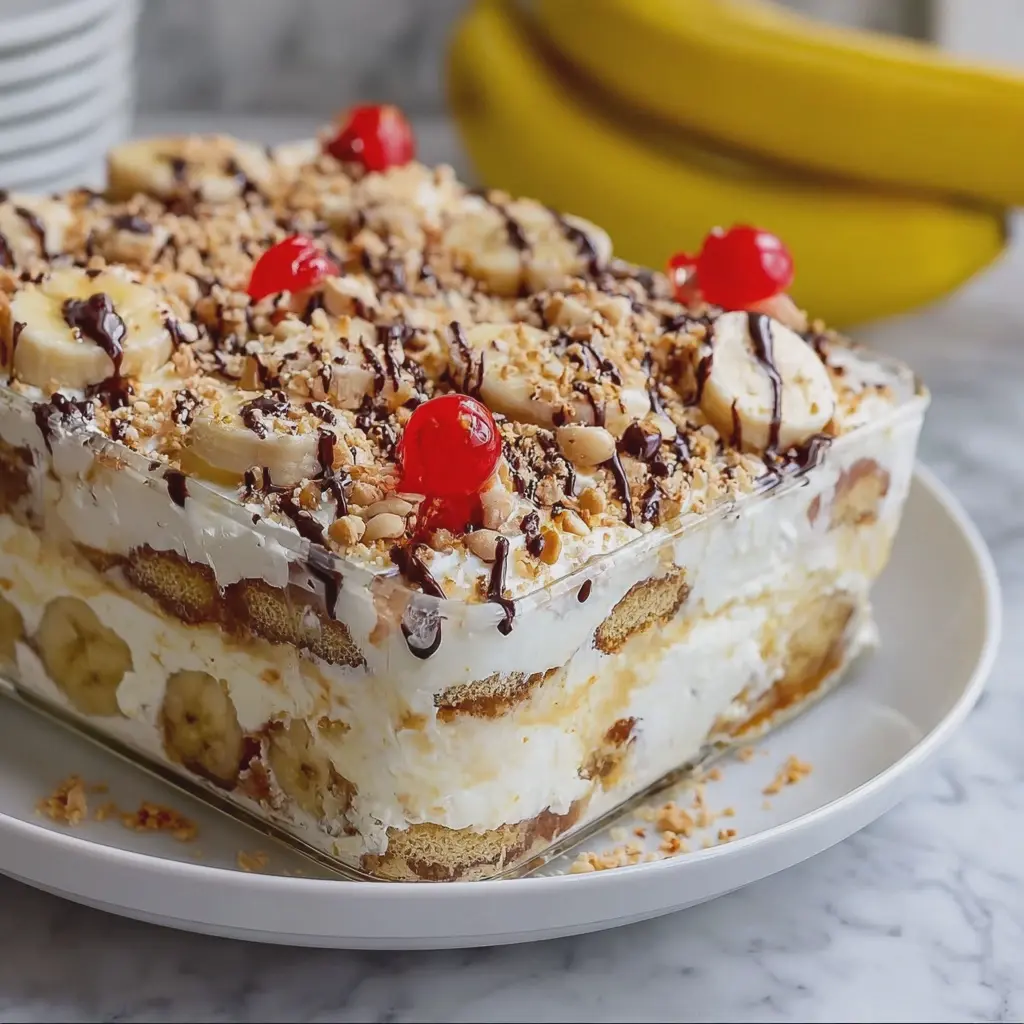
Ingredients for Banana Cheesecake Icebox Cake
Creating a banana cheesecake icebox cake at home is easier than you think! Let’s gather the essential ingredients to make this delightful dessert a reality. Here’s what you’ll need:
Creamy Cheesecake Mixture
- 8 oz Cream Cheese: Make sure it’s softened for easy mixing.
- 1 cup Heavy Whipping Cream: This adds a luscious texture when whipped.
- ½ cup Sugar: Feel free to adjust based on your sweetness preference.
Flavorful Additions
- 1 teaspoon Vanilla Extract: Enhances the overall flavor of the cheesecake.
- 2 ripe Bananas: The star of our cake, ripe bananas add natural sweetness and moisture.
Structure and Assembly
- 2 cups Graham Cracker Crumbs: These create the base and layers of your cake.
- 4 tablespoon Unsalted Butter: Melted, for binding the crumbs together.
- Sliced Bananas: For layering and garnishing to add a fresh touch.
With these ingredients, you're well on your way to creating a magnificent banana cheesecake icebox cake! Remember, the quality of your ingredients can elevate your dessert, so choose fresh and high-quality items whenever possible. You can explore some tips on selecting the best bananas here. Happy baking!
Step-by-step Preparation of Banana Cheesecake Icebox Cake
Preparing the pan and ingredients
Before diving into the delightful world of our banana cheesecake icebox cake, let’s set the stage. First, gather your essential ingredients:
- 2 cups crushed graham crackers
- ½ cup melted butter
- 8 oz cream cheese (softened)
- 1 cup powdered sugar
- 1 teaspoon vanilla extract
- 2 ripe bananas
- 2 cups heavy cream
- Optional: chocolate shavings or nuts for garnish
Now, prepare your pan. A 9x13-inch baking dish is perfect for this recipe. Lightly grease it to make sure your cake comes out easily later on. Getting this step right will save you a headache when it's time to serve!
Making the cheesecake cream
Now that you’re all set up, let’s create the irresistible cheesecake cream. In a large mixing bowl, use an electric mixer to blend the softened cream cheese until it’s light and fluffy. This may take about 2-3 minutes. Next, gradually add in the powdered sugar and vanilla extract, mixing until fully incorporated.
Did you know that cream cheese has been a popular choice for cheesecakes since the 19th century? Its smooth texture and rich flavor make it an absolute favorite.
Whipping the heavy cream
Moving on to the magic component — the heavy cream! In another bowl, whip your heavy cream until stiff peaks form. This usually takes about 3-5 minutes. Here’s a tip: For best results, make sure your bowl and beaters are cold. It helps the cream whip faster and increases the volume.
If you’re curious about whipping techniques, you can check this guide on how to whip cream properly. A perfectly whipped cream will add that airy lightness to your cheesecake filling, making it even more wonderful!
Combining the filling
Now comes the exciting part: combining your ingredients! Gently fold the whipped cream into the cream cheese mixture. Be careful not to deflate the whipped cream; you want to keep that lovely lightness. Slice one banana into small pieces and sprinkle them throughout the mixture to create a delicious, fruity flavor.
Bananas are not just tasty; they also bring sweetness and moisture to the cake, giving it that classic banana flavor we all love. You might even want to consider using this banana cheesecake icebox cake for a summer gathering — it's sure to impress!
Assembling the icebox cake
With our filling ready, let's start assembling. Layering is key here: sprinkle a layer of crushed graham crackers on the bottom of your pan, followed by a generous layer of the banana cheesecake filling. Slice the remaining bananas and place them on top before adding another layer of graham cracker crumbs. Repeat this process until you’ve used up your ingredients, ending with a final layer of cheesecake cream.
The texture of the graham crackers adds that perfect crunch to each bite, complementing the smooth cheesecake.
Chilling the cake
Finally, it’s time for the waiting game — let your banana cheesecake icebox cake chill in the refrigerator for at least 4-6 hours or overnight if you can wait that long! This helps the layers meld together beautifully and makes slicing easier.
When you’re ready to serve, consider topping with chocolate shavings or nuts for added flair.
And there you have it! A delightful dessert that's easy to whip up and sure to bring smiles. This banana cheesecake icebox cake is perfect for any occasion, from casual weeknight dinners to fancy celebrations. Enjoy every creamy, banana-filled bite!
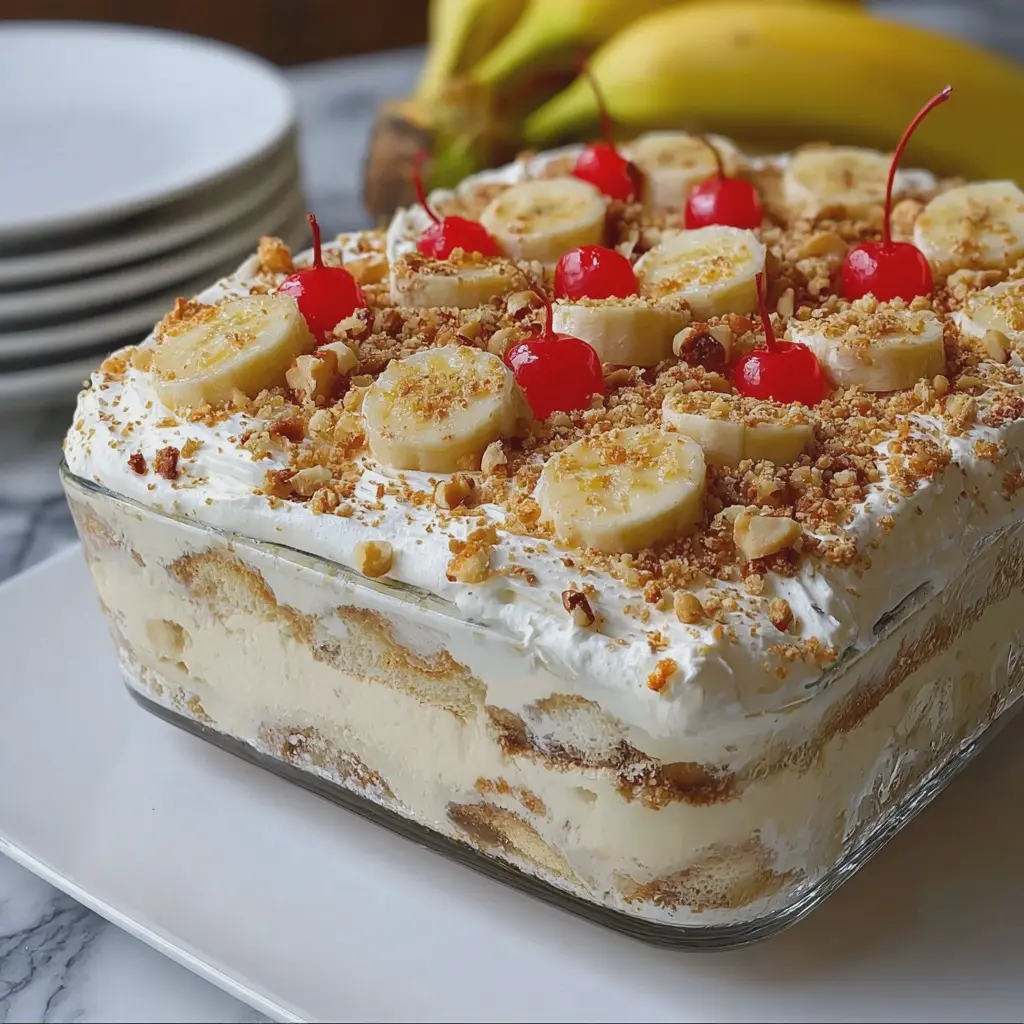
Variations on Banana Cheesecake Icebox Cake
Adding Chocolate Layers
If you’re a chocolate lover, consider adding rich layers of chocolate to your banana cheesecake icebox cake. Simply melt some dark chocolate and incorporate it into the cheesecake filling for a decadent twist. Alternatively, you can layer chocolate graham crackers instead of regular ones for an added flavor boost. If you’re feeling adventurous, try drizzling some chocolate sauce on top right before serving. This will not only enhance the taste but also create a visually stunning dessert.
Using Different Fruit Options
The beauty of an icebox cake lies in its versatility. While bananas are a classic choice, why not explore other fruits? Fresh strawberries, blueberries, or even peaches can elevate your cake to a whole new level. Each fruit brings its own unique flavor and texture, making your dessert a delightful surprise with every bite. For a tropical vibe, mango or pineapple can add that perfect hint of sweetness.
When experimenting with fruits, consider balancing flavors; for instance, combining tangy raspberries with creamy cheesecake can create a delightful contrast.
Personal Tips
Remember, your banana cheesecake icebox cake can reflect your personal taste! Don’t hesitate to mix and match different flavors and textures. If you're curious about the numbers behind these combinations, check out the nutritional benefits of fruits on Healthline for inspiration.
In conclusion, whether you stick with bananas or opt for something new, the key is to have fun in the kitchen and make it your own!
Cooking Tips and Notes for Banana Cheesecake Icebox Cake
Making a delicious banana cheesecake icebox cake is easier than it seems! Here are some handy tips to ensure your cake turns out perfectly every time.
Choose Your Bananas Wisely
Opt for ripe, but not overly mushy bananas. They should have a few brown spots for optimal sweetness. Overripe bananas can affect the texture and flavor, leading to a mushy cake. If you're unsure about ripeness, consult this guide on banana ripeness from Healthline.
Layering Matters
Layer your ingredients thoughtfully. Start with a layer of cream cheese mixture, then add graham crackers, bananas, and repeat. This method helps create a balanced flavor in every bite. Don’t rush—give each layer a chance to set properly for a harmonious blend of flavors.
Chill Time is Key
After assembling your banana cheesecake icebox cake, let it chill for at least 4 hours, or ideally overnight. This allows flavors to meld beautifully, and the cake to firm up, making it easier to slice.
With these tips, you’ll craft a stunning and scrumptious icebox cake worthy of any celebration. Happy baking!
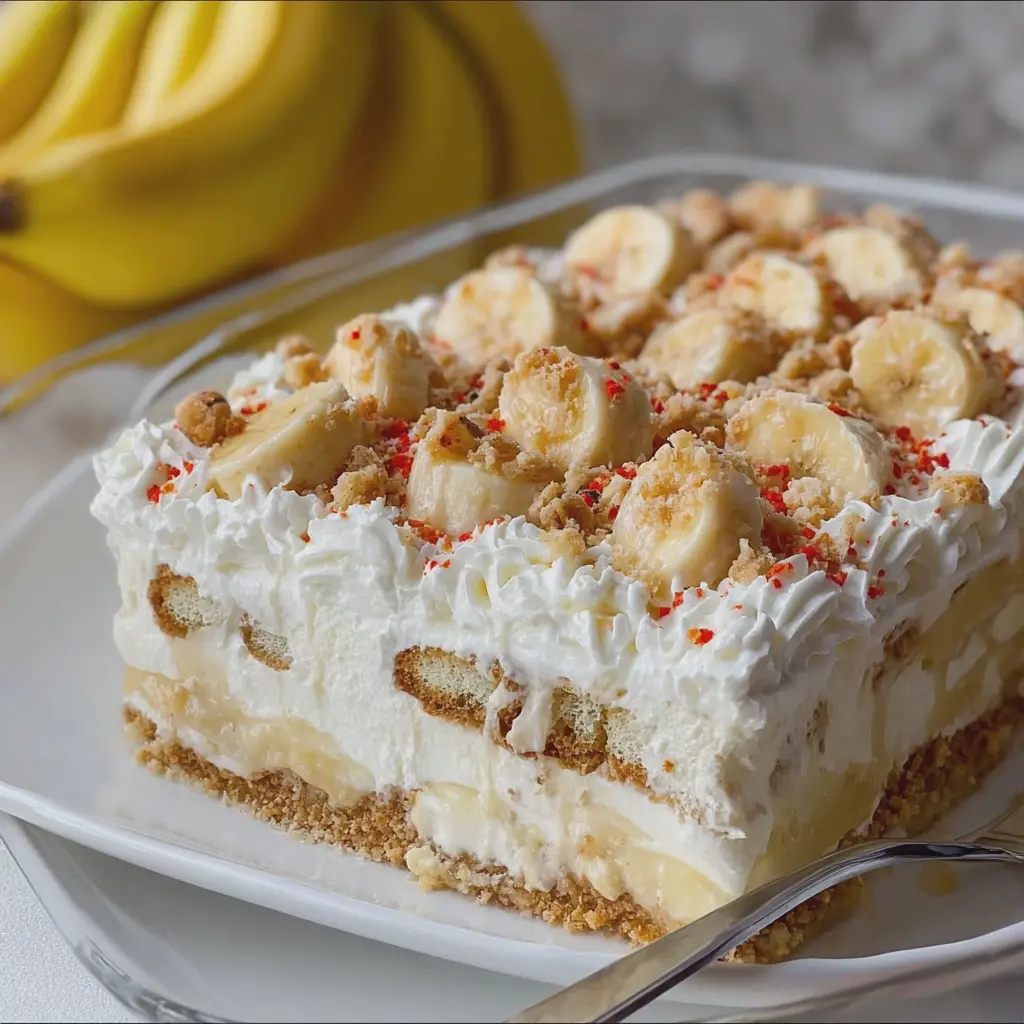
Serving Suggestions for Banana Cheesecake Icebox Cake
When it comes to enjoying your banana cheesecake icebox cake, the possibilities extend far beyond just slicing and serving. Elevate your dessert experience with these tasty suggestions that are sure to impress!
Pairing Suggestions
-
Fresh Fruits: Serve with a side of mixed berries, such as strawberries, blueberries, or raspberries. Their tartness complements the rich, creamy layers of the cake brilliantly.
-
Nutty Crumble: Top each slice with a sprinkle of toasted walnuts or pecans. This adds a delightful crunch and a touch of nuttiness that enhances the banana flavor.
Creative Serving Ideas
-
Whipped Cream Extravaganza: Drizzle on some homemade whipped cream or even a flavored cream cheese frosting for a luxurious touch.
-
Hot Beverage Pairing: Enjoy with a warm cup of herbal tea or freshly brewed coffee, which can beautifully balance the sweetness of the banana cheesecake icebox cake.
Fun Presentation
- Glass Jars: For a casual gathering, serve individual portions in cute glass jars. Not only does it look adorable, but it also makes cleanup easy!
With these suggestions, your banana cheesecake icebox cake will be more than just dessert; it'll be an experience! For more ideas on serving delicious treats, check out Serious Eats or Joy of Baking for inspiration.
Time Breakdown for Banana Cheesecake Icebox Cake
Preparation time
Getting started on your banana cheesecake icebox cake is a breeze! You'll need approximately 20 minutes to gather your ingredients, blend the cheesecake mixture, and layer in those delicious bananas and graham crackers. This is a fun stage to express your creativity—don’t forget to taste as you go!
Chilling time
Once your cake is assembled, it's time for the magic to happen in the fridge! Allow it to chill for at least 4 hours (or overnight for the best flavor). This is essential as it helps the layers meld together and creates that delightful, creamy texture.
Total time
In total, you're looking at about 4 hours and 20 minutes from start to finish (not accounting for any extra chill time you might want). This makes it a perfect dessert for a gathering or a cozy night in. So, gather your ingredients and enjoy every step of this delicious journey! For more kitchen tips, check out this fantastic resource on getting the perfect cheesecake texture.
Nutritional Facts for Banana Cheesecake Icebox Cake
Calories per serving
When indulging in a slice of banana cheesecake icebox cake, it’s helpful to know what you’re treating yourself to! Each serving typically contains around 250 calories. This makes it a delightful dessert without going too far off your daily caloric balance.
Key nutritional components
This cake isn’t just delicious; it offers some nutritional perks too:
- Carbohydrates: Primarily from the bananas and crust, providing quick energy.
- Fiber: Thanks to the bananas, which aids digestion and keeps you feeling fuller longer.
- Calcium: A beneficial component from the cheesecake filling, supporting your bone health.
If you're curious about how certain ingredients contribute to your overall diet, check out resources like the USDA FoodData Central for comprehensive nutritional information.
So the next time you dive into this delightful treat, know that you’re also getting some nutritional goodness along with that creamy sweetness!
FAQs about Banana Cheesecake Icebox Cake
How long can I keep this cake in the fridge?
One of the best things about the banana cheesecake icebox cake is its longevity! You can keep it in the fridge for about 4 to 5 days. Just make sure it’s covered tightly with plastic wrap or kept in an airtight container to maintain its lovely texture and flavor. If you've got leftovers, don't worry—this cake is as delightful on day five as it is fresh out of the fridge.
Can I use fresh bananas instead of ripe ones?
While fresh bananas can certainly be used, for the best results in your banana cheesecake icebox cake, opt for ripe bananas. Ripe bananas are sweeter and easier to mash, really adding to the creamy texture of the cake. Think of it this way: ripe bananas bring a deeper flavor and create a smoother filling. If you're in a pinch, slightly bruised bananas work beautifully, too!
What can I use instead of cream cheese?
If you’re looking to switch things up or cater to dietary preferences, there are some great alternatives to cream cheese. You could try using Greek yogurt for a tangy twist or even a dairy-free cream cheese option if you're avoiding dairy altogether. Silken tofu blended until smooth is another fantastic substitute, providing a silky consistency without the dairy.
Want to explore more about cream cheese alternatives and other substitutes? Check out resources like Healthline for in-depth ideas!
This friendly guidance should make your banana cheesecake icebox cake adventure even more fulfilling, bringing sweetness to your kitchen!
Conclusion on Banana Cheesecake Icebox Cake
In wrapping up our delightful journey into the world of banana cheesecake icebox cake, it's clear that this dessert is a crowd-pleaser, perfect for any occasion. Easy to prepare, this recipe combines the creamy goodness of cheesecake with the comforting flavor of bananas, creating a treat that’s both indulgent and refreshing.
Consider sharing it at your next gathering, and watch as your friends rave about its deliciousness. Whether it’s a summer barbecue or a cozy fall dinner, this cake fits right in. For more dessert inspirations, check out sources like Food Network or Bon Appétit. So grab those ingredients, and let the layering fun begin!
PrintBanana Cheesecake Icebox Cake: Easy, Indulgent Summer Delight
A deliciously easy and indulgent summer dessert featuring layers of creamy banana cheesecake and graham crackers.
- Prep Time: 30 minutes
- Total Time: 4 hours 30 minutes
- Yield: 12 servings
- Category: Dessert
- Method: No-Bake
- Cuisine: American
- Diet: Vegetarian
Ingredients
- 2 cups crushed graham crackers
- ½ cup unsalted butter, melted
- 2 cups cream cheese, softened
- 1 cup powdered sugar
- 2 cups heavy whipping cream
- 2 ripe bananas, sliced
- 1 teaspoon vanilla extract
- ¼ cup lemon juice
Instructions
- In a medium bowl, mix crushed graham crackers and melted butter until well combined.
- Press the mixture into the bottom of a 9x13 inch baking dish to create the crust.
- In another bowl, beat together cream cheese and powdered sugar until smooth.
- Add heavy whipping cream, vanilla extract, and lemon juice. Beat until mixture is fluffy.
- Fold in sliced bananas gently to avoid mashing.
- Spread the cheesecake mixture over the graham cracker crust evenly.
- Layer remaining banana slices on top of the cheesecake.
- Cover with plastic wrap and refrigerate for at least 4 hours or overnight.
- Slice and serve chilled.
Notes
- For added flavor, you can drizzle some caramel sauce on top before serving.
- Use ripe bananas for the best sweetness and flavor.


Leave a Reply